
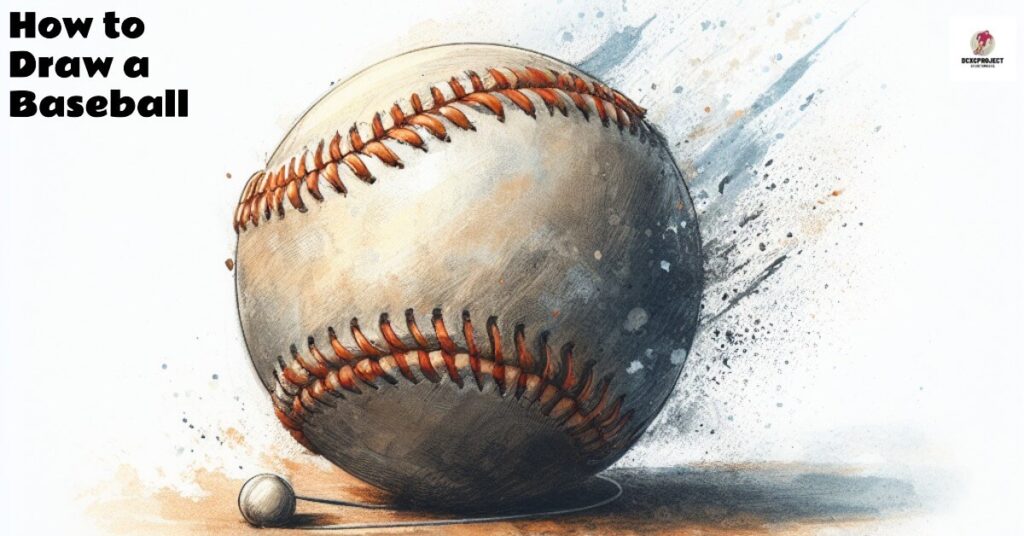
Drawing a baseball might seem like a daunting task, but with a little guidance and practice, you can create a realistic sketch. Here’s a simple, step-by-step guide on how to draw a baseball
Drawing a baseball is a simple task that begins with the fundamentals of shape and line work. Capturing the essence of this iconic sport’s main component involves precision and attention to detail. Artists and hobbyists alike often seek to perfect the depiction of a baseball, whether it’s for a sporting illustration or just for fun.
With an understanding of its spherical shape and distinctive stitching, the task becomes less daunting. Sketching a baseball can be an enjoyable exercise in observational drawing, and mastering it can add a touch of realism to any sports-themed artwork or design. So grab your pencil and a clean sheet of paper, and let’s step up to the creative plate.
Introduction To Drawing A Baseball
Drawing a baseball may seem like a simple task, but there is more to it than meets the eye. It’s a fantastic subject to practice combining geometric shapes, lighting, and texture. Whether you’re a budding artist or just looking for a fun sketching project, crafting a realistic baseball can be both enjoyable and rewarding. Let’s step up to the plate and start with the fundamentals of capturing this iconic piece of sports equipment on paper.
Understanding The Basic Shapes
Recognizing the core shapes forms the foundation of drawing a baseball. A baseball is not just a circle; it’s a three-dimensional sphere that requires a keen eye to capture depth and form. You will start with a perfect circle before adding the intricate details that bring it to life.
- Sketch a circle to outline the baseball’s form.
- Overlay the circle with two curved lines that represent the seams.
- Add small stitches along the seams, keeping symmetry and perspective in mind.
Importance Of Light And Shadow
Understanding light and shadow is essential in giving your drawing dimension and realism. It helps illustrate the form and texture of the baseball. Observe how light hits the surface and where shadows naturally occur.
- Identify the light source direction.
- Shade the baseball accordingly to represent curvature.
- Highlight the areas where light is most intense and darken where shadows are cast.
Remember, controlling the contrast between light and dark areas will greatly enhance the three-dimensional illusion of your baseball drawing.
Step 1: Sketching The Basic Outline
Starting to draw can be as thrilling as a bottom of the ninth inning. When it’s a baseball you’re sketching, capturing that perfect round shape is your first home run. This step-by-step guide will help you with the initial outline, ensuring your drawing has a solid foundation. Let’s get your creative game going!
Drawing A Circle
Your baseball drawing begins with the creation of a simple circle. This represents the ball’s structure and is crucial for achieving a realistic look. To draw the circle:
- Choose your drawing tool: A compass is ideal for making a perfect circle, but if you don’t have one, tracing around a circular object like a cup or a lid is a great alternative.
- Size it up: Consider the size of your paper when determining the diameter of your baseball. Leave enough space for details and avoid making the circle too big or too small.
- Light strokes: Use light, gentle strokes to sketch the circle. This makes correcting mistakes easier, as details will be added later that can refine the shape.
After drawing the circle, ensure it’s even and symmetrical, as any irregularities can throw off the final piece. If necessary, use an eraser to adjust the shape until it’s just right.
Adding The Stitching Details
A baseball wouldn’t be complete without its iconic red stitching. At this stage, it’s time to add those details that transform the circle into a baseball. Here’s how:
- Identify the midline: Lightly draw a narrow oval to represent the midline where the stitching will go; this is where the two halves of the baseball’s leather come together.
- Mark the stitch paths: Parallel to the midline, draw two slightly curved lines that will indicate where the stitches will lie. They should mirror the contour of the midline but be spaced apart to create a realistic look.
- Sketch the stitches: Along these lines, draw small ‘V’ shapes to simulate the stitch pattern. Remember, stitches on a real baseball are not perfectly spaced, so slight variations add authenticity.
While adding stitches, keep a steady hand and uniform pressure to maintain consistency. If needed, erase and redraw until you’re satisfied with your baseball’s detailed outline.
Finishing this initial step is like rounding the first base. With the basic outline and stitching in place, your drawing is off to a solid start—ready for the next steps of detailing and shading!

Step 2: Adding Dimension And Texture
Welcome to Step 2: Adding Dimension and Texture in our guide on how to draw a baseball. With the basic shape of the baseball captured, it’s time to bring your drawing to life with the illusion of dimension. In this step, we’ll introduce shading techniques and highlight strategies that will transition your drawing from a flat circle to a rounded, textured baseball ready to leap off the page!
Incorporating Shading Techniques
Shading is fundamental in adding dimension and a realistic touch to your baseball drawing. Let’s explore the different ways you can add shades:
- Hatching: Create a series of parallel lines to suggest light and shadow. This can imply a subtle texture, mimicking the leather of a baseball.
- Cross-hatching: Use intersecting sets of parallel lines for a deeper level of shade, enhancing the roundness of the ball.
- Smudging: Gently smudge your pencil lines for a smoother transition between light and dark. This can give your baseball a softer, more worn-in look.
- Stippling: Dotting the paper with your pencil point can add texture and depth, suggesting the roughness of the ball’s surface.
Begin by shading around the curves of the baseball, where less light would naturally strike the surface. This will immediately give your drawing a three-dimensional form.
Creating A Sense Of Depth With Highlights
Highlights are just as important as shadows in giving your baseball drawing a sense of depth. They suggest where the light hits the surface of the ball most directly. To create highlights:
- Identify the light source in your drawing. This will determine where to place your highlights.
- Use an eraser to lift graphite off the page where the light is strongest, typically on the opposite side of your shading.
- For a stronger contrast, leave areas of the baseball completely white to represent a glossy, reflective texture.
Remember, the placement and intensity of your highlights can dramatically affect the realism and texture of your drawing. Take your time with this step to ensure the lighting looks consistent and believable.
Step 3: Refining And Finalizing The Details
We’ve successfully sketched the basic shape and outlined the key features of our baseball drawing. Now, it’s time to dive into Step 3: Refining and Finalizing the Details. This is where your artwork comes to life, as we add texture, sheen, and realistic stitching. In this phase, attention to detail is paramount, and each stroke will contribute to a more lifelike representation of this iconic sports equipment.
Adding Sheen To The Surface
To create a sense of depth and material, we’ll now focus on adding a sheen to the baseball’s surface. A baseball is not perfectly matte; it has a slight gloss that reflects light. Let’s capture this effect:
- Select a lighter shade of your baseball’s base color.
- Create subtle highlights on the areas where light naturally hits the ball, such as the top curve.
- Use a soft touch with your drawing tool to blend these highlights, avoiding hard lines.
The added sheen will give your baseball a rounded, three-dimensional appearance, making it pop off the page.
Emphasizing The Stitching For Realism
The stitching is a defining characteristic of a baseball. To emphasize the stitching for realism, follow these detailed steps:
- Identify the path of the stitches around the ball’s circumference, taking care of the overlapping pattern.
- Use a red or pink colored pencil to draw each stitch, ensuring they are uniform in size and shape.
- Shade the edges of the stitches lightly to give them depth and make them stand out against the ball’s surface.
- Add tiny shadows below each stitch to anchor them to the surface and enhance the 3D effect.
Remember, the goal is not just to draw the stitches, but to make them look intertwined and authentic, as they would on a real baseball.
Dedicating time to refining and finalizing the details will transform your simple sketch into a realistic and tangible drawing. With these enhancements, your baseball illustration is not merely a circle with lines but a shiny, textured object that almost feels like it could be picked up and thrown for a pitch.
Conclusion And Final Tips
Drawing a baseball might appear straightforward at first, but achieving a realistic look requires attention to detail and practice. A well-drawn baseball can add dynamic action to sports illustrations or serve as a heartwarming reminder of America’s favorite pastime. With the steps covered, you’re now armed with the knowledge to sketch this iconic sports equipment with confidence. Let’s review the artwork and go over some final tips to enhance your drawing skills.
Reviewing The Final Artwork
After completing your baseball drawing, take a step back and observe the lines, textures, and shadows. The leather’s texture, the precise stitches, and the spherical shape should all appear realistic and three-dimensional. Don’t hesitate to compare your drawing to an actual baseball or reference images to ensure accuracy. Through comparison, you can identify areas for improvement in shaping and shading.
- The roundness of the ball – ensure it’s not oval or misshapen.
- The red stitching – they should follow the curve of the ball consistently.
- Shadow and light – these should give the ball depth and dimension.
Display your artwork to family or friends, or even share it online. Fresh eyes often catch details that you might have missed and can offer constructive feedback.
Additional Tips For Improving Your Baseball Drawing
Here are some actionable tips to take your baseball drawings to the next level:
- Practice regularly: Drawing consistently will improve your skills over time.
- Try different perspectives: Drawing the ball from various angles builds spatial awareness and skill diversity.
- Experiment with shading: Using different pencils or tools for shading can add depth to your drawing.
- Study real baseballs: Observe and feel the texture, weight, and stitches to render more accurately on paper.
Focusing on the fine details can make your drawing stand apart, so pay attention to the nuances between stitches and how light interacts with the object. And remember, every artist has a unique style; embrace yours as you continue to sketch. Keep it simple, yet strive for improvement with each new drawing.
Frequently Asked Questions Of How To Draw A Baseball
What Are The Steps To Draw A Baseball?
Drawing a baseball involves a few simple steps. Start with a flawless circle using a compass for consistency. Add the characteristic curved stitch lines inside, resembling a pair of parentheses, () with small V shapes to imitate stitches. Finish with shading for a 3D effect.
What Materials Do You Need For Baseball Sketching?
For sketching a baseball, you’ll need a pencil, eraser, compass for perfect circles, paper, and optionally, colored pencils or markers for detailing. Consider using a fine liner for sharp stitch lines. Good quality sketch paper can enhance the final look.
How Do You Sketch A Realistic Baseball?
To sketch a realistic baseball, focus on the details like the texture of the leather and the stitching. Begin with a smooth circle, then carefully draw the red stitches with a slight curve to show dimension. Use shading techniques to give depth.
Can Beginners Learn To Draw A Baseball Easily?
Yes, beginners can easily learn to draw a baseball. It starts with simple shapes and requires minimal drawing skills. With practice and attention to detail, anyone can create a recognizable baseball illustration.
Conclusion
Drawing a baseball can be both fun and rewarding. With the basic steps covered in this post, you’re now equipped to create your own detailed illustration. Sharpen those pencils and keep practicing. The more you draw, the more lifelike your baseballs will become.
Swing into action and let your artistic talent shine!